|
Here are my impressions of the new
(as of April
2000) SBIG STV. Jumping the gun, I want to say
that the firmware is very nice and easy to use,
but during initial setup of the STV, I had some
frustrating moments. The following is a
basically chronological step-through of my
experience, so it might seem a bit negative at
first...
First, turn it on...
I almost didn't get past this point. When I
first turned it on, the unit was completely
dead! To say I was dismayed would be a big
understatement.
So after checking the power supply, I proceeded
to take the control box apart to get to the
fuse. This checked out.
Unable to get any farther without
documentation, I called SBIG's technical
support. I'm sure they were as dismayed as I
was to hear that the unit was dead! But in the
end, all turned out fine. As I was probing
points at their direction, I noticed that some
pins in the connector between the power switch
and the main board had backed out of the shell.
Forcing the pin back into the connector shell
fixed the problem! I want to thank the SBIG
people for taking the time to try and get the
problem solved while on the phone. In most
cases, the immediate response of tech support
is to have you send the unit back and after
waiting 3+ months to get the unit, that would
*really* have made me upset.
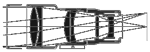
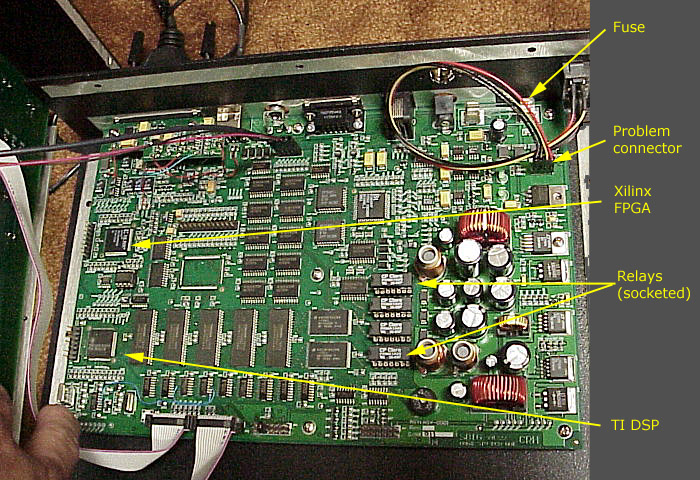
At any rate, that's why
my first picture was the
inside of the STV. Besides indicating the
problem connector, I've pointed out some of the
landmarks on the motherboard for interested
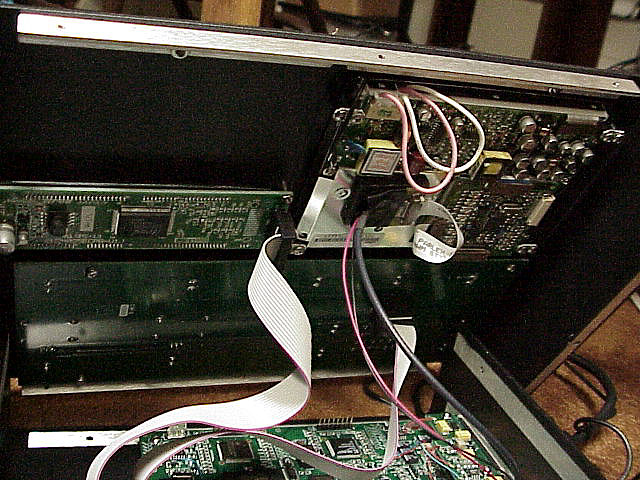
engineers. While we're inside the STV,
second photo shows the
underside of the control panel -- circuitry to
the LCD, keys, and alphanumeric display. When
opening the cover, you have to be careful not
to disconnect or damage the cable connections
to the main board which sits in the bottom of
the box.
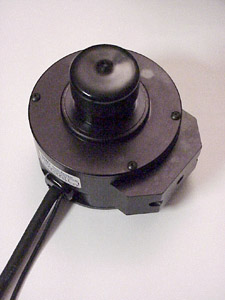
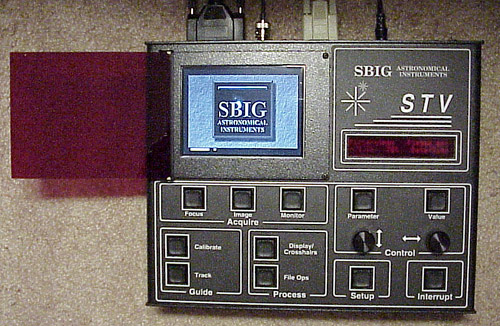
Intro to the STV
The primary parts of the STV are the control
box shown at right:
and the CCD camera head.
The built-in display is an LCD display which
surprisingly is a color display, though I don't
know why since color doesn't seem to be used in
the interface.
You can set a "night-vision"
mode which turns the display all red, but the
intensity is too high, which is probably why
there is an additional flip up red filter. I
just know that I'll eventually hit that filter
when it's flipped up as shown, so one of the
first mods will be to take it off the hinge and
just velcro it in place.
The CCD camera head has T-threads cut into it
and a nose-piece which threads into this to
allow you to insert it into a standard 1-1/4"
eyepiece tube (shown covered in the photo).
This seems straightforward
enough, but guess what? The nosepiece is just
a little too large to fit straight into my
Celestron 60mm f/7 guidescope! Subsequently,
a friend measured the nosepiece OD at 1.253
inches, and SBIG acknowledged a problem. They
are sending me a replacement.
Fortunately, the guidescope allows you to
remove the eyepiece tube and put on a T-thread
coupler. But this uncovered another
awkwardness of the camera head. In the
situation I had, I had to thread the CCD head
onto the telescope. Because the cable can't
be disconnected from the head, it naturally
twists up. You can either have the cable
disconnected from the controller and twist
it as you screw the head onto the scope
(assuming you haven't nicely arranged the
cable up and down your mount already), or
pre-twist the head so when you screw it down,
it ends up with no net twists in the cable.
It's not a fatal problem, but a definite
annoyance which could be avoided by putting
a connector on the head end of the cable.
Guiding with the STV
Ease of use of this second generation guider is
really one of the reasons why I hand guided
up to now instead of getting an ST-4, and the
STV certainly seems to deliver on that. The
main things of interest as an autoguider are:
- Focusing is easy since you can see the
guidestar.
- Calibration has an "auto" mode.
- Tracking has an "auto" mode.
Using my 60mm f/7 guidescope and a G11 mount,
the firmware seemed to work very well. In auto
mode, you just press "calibrate" twice and it
automatically selects the brightest star, moves
the scope in each direction, and calculates the
distance and angle moved in each direction.
There's no need to orient the CCD head to the
scope axes.
Calibration Tip:
Don't calibrate in a field full
of stars. Even if the STV selects
the central star for calibration, if
too many stars fall off the edge of
the field during its cal sequence, it
will stop with an error. Calibration
is best if there is a single bright
(but not too bright)
star in the center of the field.
|
To start tracking, you just press "track"
twice, and away it goes, showing you the
guidestar in a little box (though no reference
crosshairs, which would be nice), and the
correction magnitudes are graphed for each
axis.
Of course at this point I haven't had a chance
to really test the guiding on the comatic
images of a dim guidestar in an off-axis
guider, but certainly for guiding using a
reasonably bright star in a guidescope, it's
virtually point and shoot.
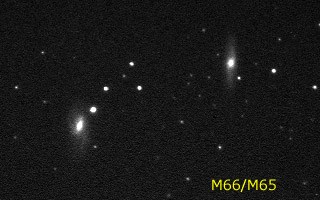
Imaging with the STV
Imaging is not the reason why I
purchased the STV, but it's a nice
plus. Here's a couple of my first
shots from a reasonably dark site,
taken with my 60mm f/7 guidescope in
between film shots. The M65/M66 shot
is a 60 second exposure, while the
Omega Centauri shot is a 10 second
exposure.
Again it was very easy to use. Just
select the exposure time and whether
or not to apply a dark frame, then
fire away. When viewing the result,
the brightness and contrast can be
adjusted. And if you like it, you can
save the image in nonvolatile internal
storage for later downloading into
your PC.
Though I haven't had a chance to use them yet,
there are some intriguing imaging modes besides
the basic ones. The "Best Sharp" mode
continuously takes images and saves the
sharpest one (said to be good on planets),
and "Best Peak" does the same thing but uses
the peak value as the save criterion (said to
be good on double stars).
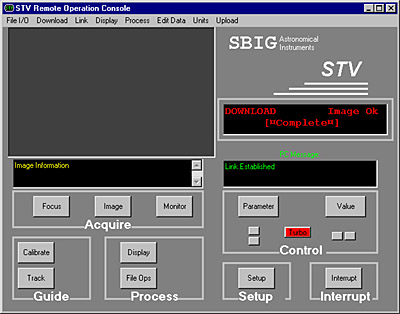
PC Software
The STV Remote software for Windows 95/98 comes
on two floppy disks, a nice break from "heavy"
Windows applications. In addition, it doesn't
crash my computer -- always a big plus. The
basic look of the program tries to emulate the
front panel of the real instrument:
This emulation of the front panel isn't
complete, though, because you can't turn knobs
on your PC (you press the two pairs of
unlabeled small buttons) and the remote screen
doesn't automatically update due to the speed
of the serial link and maybe the load on the
processor in the box. You have to manually go
up to the download pulldown menu to get the
current screen image to the PC. So remote
users will have to do as suggested in the
manual and hook a video monitor up to the STV's
video output in addition to running the RS-232
cable.
Given this incomplete emulation, I question the
need to look like the box which is an interface
designed around hardware components. A
different Windows look optimized for a computer
window would probably be better.
For the most part the software works fine, but
here are some rough edges:
- Cancelling a File/Save after putting in
a duplicate file name inappropriately
warns you about the duplicate file.
- Cancelling a Process/Flat Field gives a
file I/O error that shuts down the whole
program.
- Manually adjusting the brightness and
contrast of the screen image requires
typing in numbers rather than pushing
a slider.
As I said, at least it doesn't crash my
machine, so I can live with it until an update
is available...
|

